To add new content
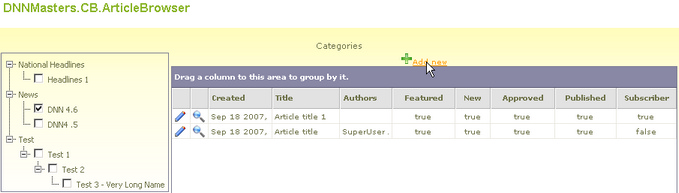
Go to CB.ArticleBrowser, select desired category and click the Add New link in the module.
Link Add New will appear only for categories where you have the Add Content permission.
If no sub-categories are in the list, you need to create a sub-category from the CB.Admin module Categories.
Edit Content interface opens up with some option panels collapsed to save space.
You can enter a title for this article in the Title field. This title will be displayed in the CB.ListView module with the article.
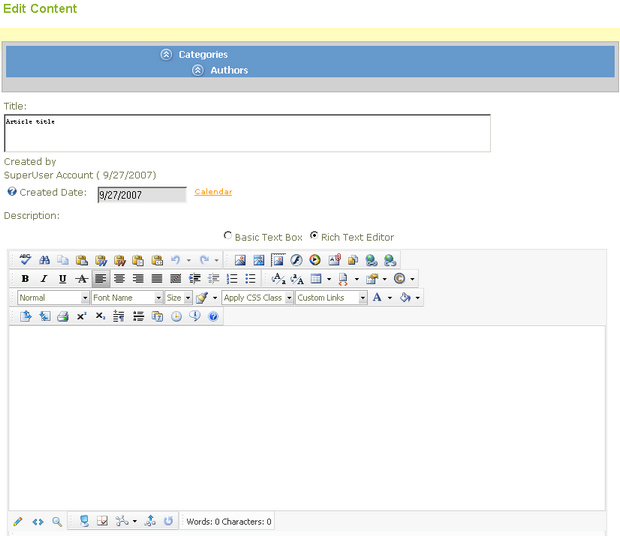
The 'Editor' option allows you to choose between rich text and plain text. Rich text allows you to format the text; plain text is text only.
In the Description Field, you can enter a brief description of your article. This will be visible by the public as well as registered users.
Click the double arrow icon to expand panels
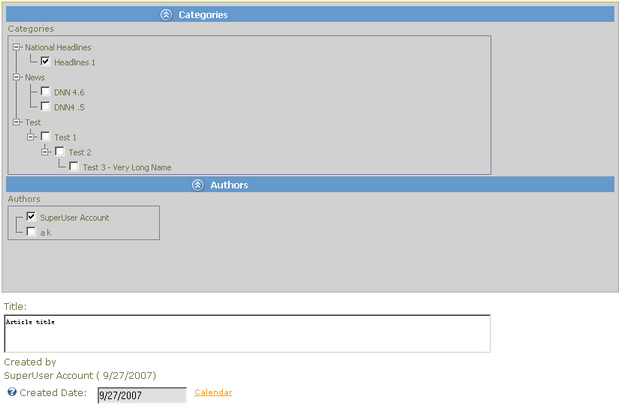
Select Category (or multiple categories) to which the article belongs. The article will inherit all permissions set for the category.
Select an author by checking the box next to it. The article will be displayed as being created by the author you select. If no author is selected, the article will be displayed as being created by the account you are logged into (displayed when creating or editing the article).
At the same time an Author record will be created in the module with data pulled in from DotNetNuke account.
You cannot change the Created by name. This is applied automatically by the system. However, only the name you select as the Author will be displayed with the article (unless no author is selected).
You can change the Created date by clicking the calendar icon next to the date. This date is automatically set to the current date by the system.
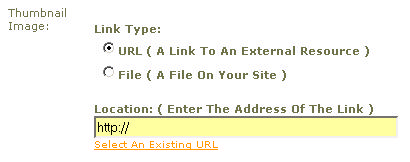
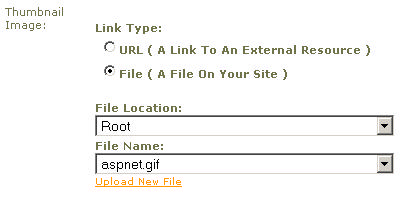
Thumbnail Image - you can add an image to display with each article in ListView module.
Image can be linked from external source or upload to portal.
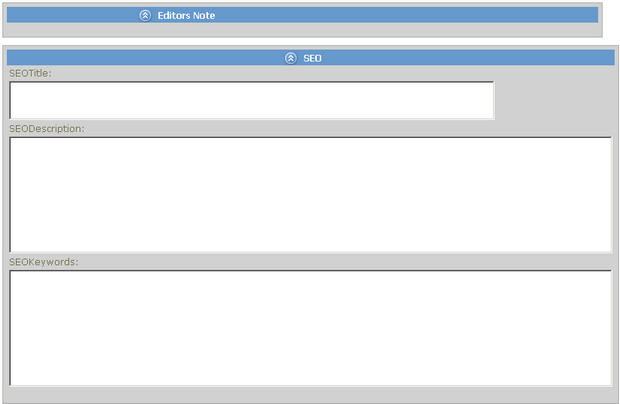
Editors Note opens to a Rich Text Editor and you can enter editor's note there if desired.
In the SEO (Search Engine Optimization) panel you can enter SEO Title, SEO Description and SEO Keywords that will be inserted as meta tags into the page source when the article is displayed.
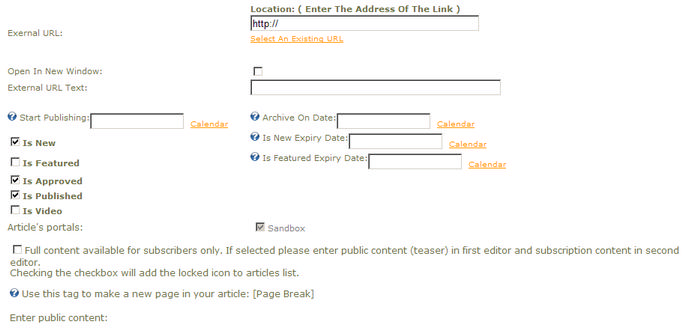
External URL - enter URL of your information source or other external link that should be displayed in ListView
Start Publishing - enter date or open calendar and select date to start publishing the article.
Archive On Date - enter date or open calendar and select date to archive the article.
Is New - if selected a New icon will be displayed with article.
New Expiry Date - enter date or open calendar and select date to expire the New icon display.
Is Featured - if selected a Featured icon will be displayed with the article.
Featured Expiry Date - enter date or open calendar and select date to expire the Featured icon display.
Is Approved - must be checked for the article to be available for publishing. If the author or creator does not have the authority to approve articles, an authorized user would need to approve the article before it will be displayed to the public.
Is Published - must be checked for the article to be published on the web site. If the author or creator does not have the authority to publish articles, an authorized user would need to publish the article before it will be displayed to the public.
Is Video - if selected a video icon will be displayed in ListView to indicate that the article contains video.
Article's Portals option allows you to display the article on more than one web site (child or parent portal) that is managed by DNN. If no portals are selected, the article will not be displayed on any web site.
Full content available for subscribers only - checking the box will allow you to determine whether the public can see only your 'teaser' article or the entire article. Public Content will be visible by users that have View permission and Subscriber Content by users that have View Subscriber Content permission.
Enter Public Content inserting images, flash, video as needed.
Use the [Page Break] tag to mark page breaks and display long articles as multi page.
If the Full content available for subscribers only box (mentioned above) is checked, this portion of the article is available to the public, but a 'locked' icon is displayed, indicating that they are not authorized to view the full article. If you wish to display the entire article to the public (if the box is not checked), this is where you would enter the full article.
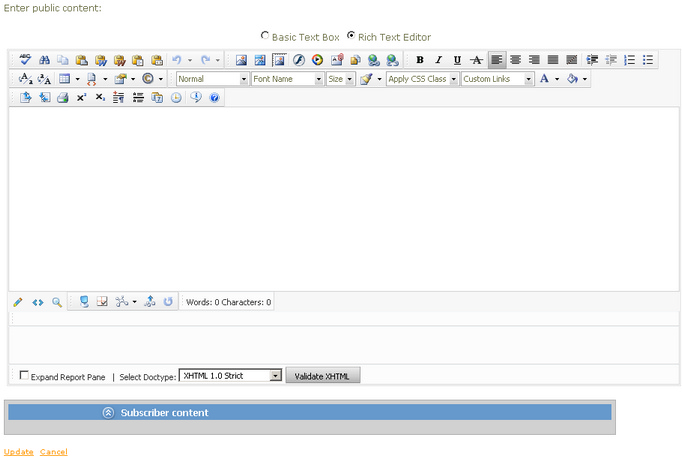
The Enter subscription content window is for content that will only be visible to users that have correct permissions on the site.
When you are finished entering the data, click Update at the bottom of the page to post the article or mark it to be Approved and Published before being posted.